Here it is – my final project (at least the preliminary attempt) for presentation tonight. I would appreciate any and all comments. It’s been a whirlwind of a semester – learning HTML and CSS, Photoshop and ideas about design. And I admit to being just a little bit tired. But it is gratifying to see my very own website appear, and not look horrible!
Category Archives: Uncategorized
Design and the Beginnings of a Site
As Beth G. has intelligently pointed out this week – a website is different than a webpage. So my design assignment, posted here, is simply that – a webpage with the nascent hint of a website. View it first here. I used the original Digital Portfolio navigation to get to the final project, and then changed the navigation to better suit the “new” site. I tried to keep the design as simple as possible, without overdoing it (since this is a national history sort of site). I’m not wed to the font – still searching for something a bit thinner and more “stately”. And I’m still trying to figure out how to change the color of the font. All of my research and tools, and I haven’t been able to fix it. Perhaps someone in class might be able to help? But all in all, it’s a start.
As suggested by Professor Petrik, I am going with something “new” (so you will see no women in the military!) and I hope you enjoy this very different sort of topic. This was also a research paper for a former class, but I am planning to make it applicable to use on a website by changing some of the format and focus. After all, this is supposed to be a digital history website, not a research paper pasted into HTML. That would be terribly boring.
Beth G. and Kirk both paused for a moment to reflect. Since plagiarism is the greatest form of flattery, I will pause for a moment as well. With all the challenges this semester has brought, I was admittedly pleased to find myself able to construct a basic webpage this week without tearing my hair out. I was even more pleased that I was able to manipulate (even if it was in minuscule amounts) the CSS to change the navigation, move things around and attempt to make the page look cleaner. It’s absolutely gratifying NOT to have an entire page crash just because I attempt to change the line-spacing. I am working on another site for a different class, and was even more pleased to see that I could confidently go into Omeka, click on the “HTML” button, and insert some of my own code! I felt like a real (almost) website builder!
So, thank you to Clio II for giving me these tools. As with all things really worth having, none of it was easy. And the journey is not over yet, but I am glad to see the light at the end of the tunnel and that the journey proved fruitful after all.
This week I posted on Beth G’sblog.
Images of Military Women – Part II
The unceremonious approach seems to have worked well for other people’s submissions, so I will follow suit. Here it is, and as Kirk stated, prepared not to be blown away. . . but, I was impressed with what I have learned in Photoshop, since I started with such humble beginnings. Enjoy, and please have fun laughing at my hand colored photo of the military women. Obviously, I have some work to do! http://womeninmilitaryhistory.com/image.html
More Photoshop – Trials and Tribulations
Ah, coloring. It was so fun as a kid. Pick a crayon (it didn’t even have to “match” whatever you wanted to color) and go to town. The littlest kids don’t even have to stay inside the lines.
My world has been turned upside down. Coloring has (hopefully only temporarily) lost its magic. Not only do I have to stay inside the lines, I have to create the lines! Our experiments in class were very helpful, though at times frustrating. I thought I would be able to replicate to some extent what I had done in class, but hand coloring a photo has completely escaped me. I will continue to try, and hope to have something vaguely resembling what we accomplished in class by tomorrow night.
In the meantime, my other experiments have fared a bit better. Please take a look at my Image assignment page http://womeninmilitaryhistory.com/image.html to check it out. I realize the outcomes are modest, but am glad to have made the progress I have made and look forward to getting better with practice!
This week I commented on Kasey’s blog and Kirk’s blog.
Photoshop – Try, try again
It sounds like everyone else experienced challenges with Photoshop as well. I will post another two photos, so you can all see some of my attempts (and am still working on them).
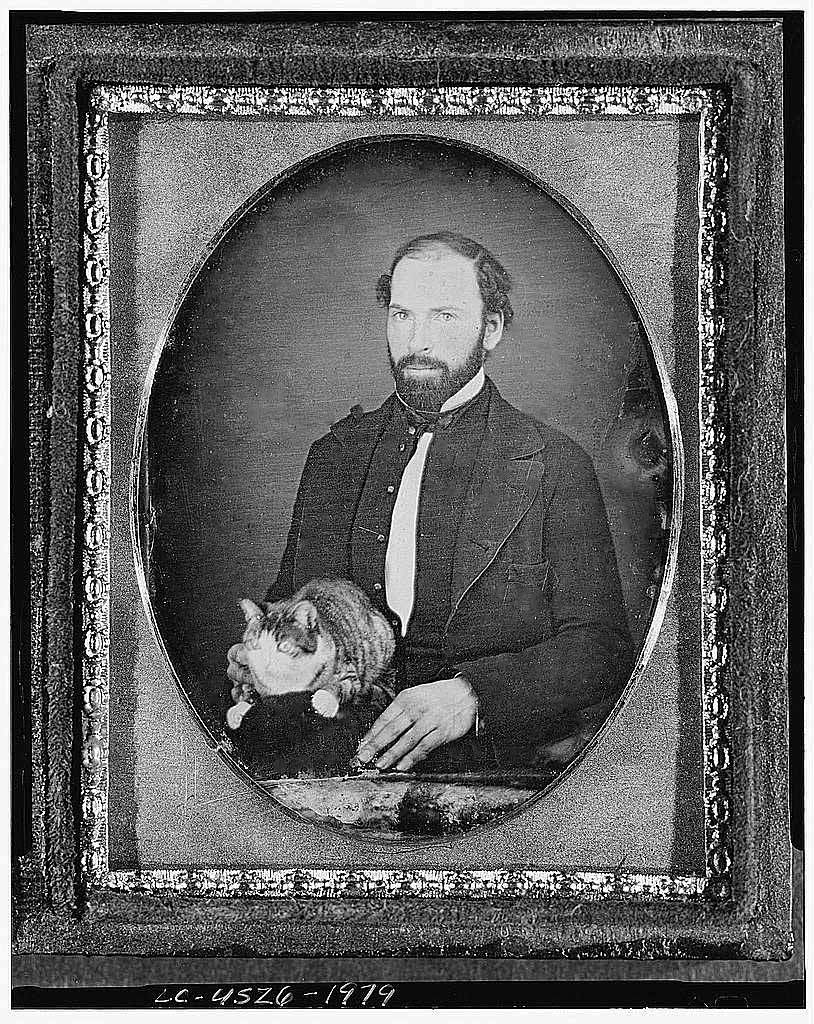
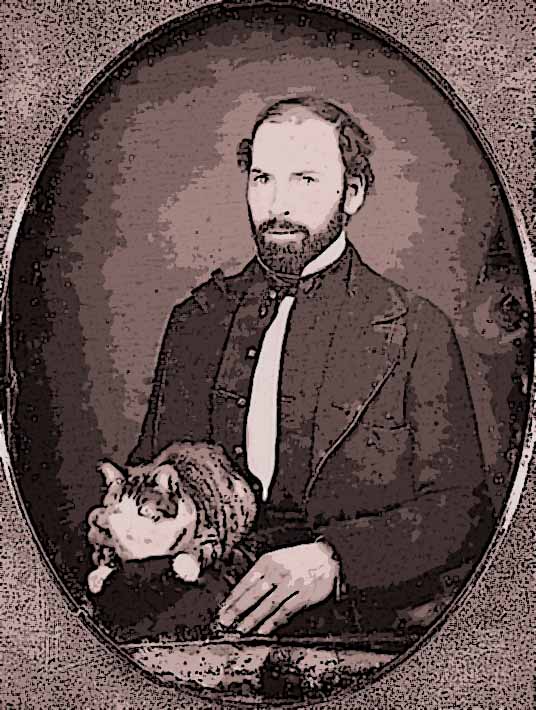
One of the things I thought about was “what does ‘fix’ mean?” Much like Kirk and Beth Garcia, fixing marks and blurs I found relatively easy to do and easy to accept. Beyond that, I had a harder time decided exactly what to do to ‘fix’ Cat and Man. Do I take out the frame, like Kirk did? Do I focus on the marks and blurs? So I did a little bit of both, and then had some fun. (see next post)
The more I thought, and the more I played with Photoshop, the more I was reminded of something in one of the Lynda.com videos. When someone asks how much it would cost to “fix” a photo, the narrator asked back, “how much time do you want me to spend on it?” We could spend an infinite amount of time fixing photos, but what are we trying to get out of it? Do we want to add context or texture? Or do we just want to bring out some of the details? As with anything, we need to think about our audience, our purpose and the second and third order effects of our “corrections”.
This week I commented on Kirk’s blog and Beth’s
Pictures as Sources
Photoshop has always intrigued me. Once we start “fixing” pictures, or changing them to make them “better”, what are we really doing? Are the pictures still “real” or are they fake? Are they works of art or interpretations?
The readings this week spoke directly to those questions. I had thought that historical pictures were supposed to be “real” and was unsure how I felt about applying Photoshop techniques to those pictures. What do we lose when we change a picture, especially when we go beyond basic cropping (to focus on one aspect of the picture)? How do we know that we are fixing something the correct way? Or does it matter? At the end of the day, the real question (for me) is – what is the purpose in applying Photoshop to a picture?
Errol Morris tries to make the case for objects that bring reality into our living rooms. The adjustments and settings that make Arthur Rothstein’s pictures so compelling also seem to detract from their credibility. This really made me look at historical photos in a completely new way. They are subject to interpretation just as much as the written word. They require research, thoughtful analysis and critical thinking just as any other primary source document might.
Another question that occurred to me – can pictures become secondary sources due to the nature of their original purpose (whether propoganda or otherwise), or their updated purpose (once subject to the tools of Photoshop)? Perhaps so.
As challenging as it has been to use Photoshop, there are more tasks ahaed of us. Before we open up a picture to “fix” it, we need to first think of what we want to accomplish and why.
Experiments in Photoshop
So this week I actually delved into Photoshop – and became a little less scared of it. Beth’s comments from before Spring Break were very appropriate. It turns out you really do just have to jump in and try some things to figure out a) you cannot break it (I always ensure I save the original as a distinct name, because I’m paranoid that I will lose it forever if I don’t) and b) you can’t really understand some of the concepts until you try to employ them.
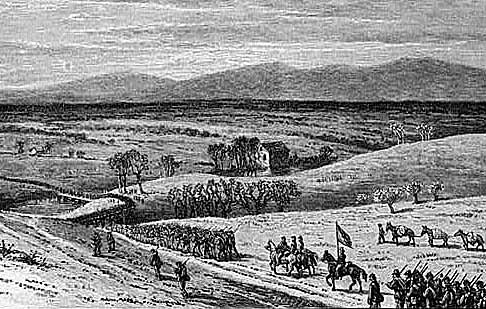
The Lynda.com videos definitely helped, since they guide you through many of the functions step-by-step, and show you what each tool looks like along the way. This significantly increased my comfort level with Photoshop, and encouraged me to try a few of the tools. To build my collection of images, I went to the Library of Congress Prints and Photographs website. For photos, I searched for women in the military, and found many World War II images of women working, whether actually in the military or in wartime production plants, etc. For the engraving, I broadened my time period (for obvious reasons) and found some images from the Civil War era that were interesting. So, I have a group of images with which to work.
Wading into the shallow end of the pool, I went for the cropping function first. I purposefully kept my expectations low. As a consequence, it was almost impossible to be disappointed with the results! With a sufficient amount of confidence-building done, I kept going. I quickly understood what Tim Grey was talking about when he said that you could conceivably spend an inordinate amount of time “fixing” an image. Instead of asking how good he wanted an image to look, he took the approach of how much time do I have to work with this image, and what is an acceptable level of improvement. This helped to scope his efforts, and prioritize where the image needed the most help. I think this will prove crucial in our projects.
Next, I tried my hand at an engraving. Again, I kept my expectations low since I was just starting to work with the application. I successfully navigated the steps contained in the reading, and was pleasantly surprised to see significant improvement in my image. (see below)

One of the things I noticed as I went through the images – I started looking for the message I wanted to convey. Cropping an image to focus on a particular aspect, highlight some portion of an image or sharpening the focus to highlight another feature became a central part of the process. Photoshop does not seem to be just about “fixing” pictures, which is always what I had assumed it to be. Making images better is an obvious, and should not be understated, use of Photoshop. However, there is more. Using the tools (and I have not even scratched the surface), a person might convey more meaning and more context than the original image alone may have done.
See my comments on Beth’s blog.
Color and Photoshop
This week we explored colors and are dipping our toes into the world of Photoshop. I admit to both excitement and apprehension as we traverse into this new area of website building. As a non-designer, I have serious doubts about my abilities to combine colors and make things look good in the way that our fellow classmates in the Art History Department can! However, I am encouraged in the system that helps us to pull colors out of photographs, use light against dark and just thinking in a purposeful way about color will make my website better. The colors currently in my website – the muted brown and green – attempt to reflect military in an understated way. I like the effect, and am looking forward to playing with the shades to see how I might improve upon that theme.
The Non-Designer’s Photoshop Book appears to offer simple, straightforward ways to delve into Photoshop. I really enjoyed the Introduction, and the constant reminders from the authors that they understand we are not experts in digital technology.
Based on Professor Petrik’s quick observations of my Type Assignment last week, I made some updates. The recommendations to use the picture and caption format from the View from the East website were fantastic! They worked perfectly in my Type Assignment, though when I attempted to apply them to my Home and About Me page, they did not work as well. I am still playing and hope to see solid results before the next class. I also managed to conquer the world of footnotes, and have adjusted my pull-quote and block quote so they look a bit better. These improvements have encouraged me to think that perhaps I have gained some understanding of the puzzle pieces of HTML and CSS necessary for website building. Each week brings new tools, and a broader understanding of the technicalities required. It is highly satisfying for a history major turned website builder!
Also, see my comments on Paul’s blog.
Type Assignment
Type Assignment
Tedious hours maneuvering style elements in the CSS style sheet and in the HTML is how I spent most of my weekend. In an effort to make things line up properly and appear in the correct size, in the correct font or exactly where I wanted them to, I spent an inordinate amount of time in small details, trying a little difference over and over and over again.
However, I learned a lot about HTML and CSS.
The page, as always, has a long way to go. But I will spend a few moments to tell you what I was trying to do. The more I look at the page, the more disappointed I am. But, I have some more time before class Monday evening!
Professor Petrik said we should write a small essay. I chose women in the Marine Corps in World War II. The topic is simple and direct.
As I began my assignment, I realized I would have to change the background of my webpage. The photo which serves as the Home/About Me background is a photo of female boots in digital cammies – certainly having nothing to do with WWII. So I went for a dark green and tan color scheme, which certainly keeps the traditional Marine Corps colors. They have the added benefit of spanning generations, so are just as easily used in any Marine Corps era.
In other respects, I tried to maintain some continuity across the pages. I kept the fonts the same, and kept the alignment the same. The navigation bars thwarted every effort thus far to get them to do what I want. I had wanted to put the main navigation at the very top of the page, and make it horizontal across the page. All efforts thus far have failed, but I will continue to try. Also, I inserted a page-specific navigation, which I thought was nice if a visitor is only interested in one aspect of the page. They can skip right to it.
I attempted to insert a picture, but cannot seem to make it fit within the body of the text. However, I did figure out how to make the caption fit under the picture! Still working on that one. I like the cursive script, because I feel it adds a feminine tone to the webpages. I purposefully called the first section “Free a Marine To Fight” because I think that is an easily recognizable WWII-type phrase that tells the visitor this is a page about women in the military in WWII, without having to read any further.
One thing that I have not attempted yet, but would very much like to do, is footnotes. I read and re-read Professor Petrik’s article on footnotes. I believe I’m starting to understand how to incorporate the CSS to make the footnotes work. What would be helpful is to understand what the HTML looks like. Has anyone else tried this so far? Any luck? I would appreciate any advice, and am looking forward to seeing everyone on Monday!
Here is the link to my Type Assignment.
This week I’ve commented on Kirk’s blog and Beth’s blog.
A Non-Designer Learns Design Fundamentals (and a bit of HTML, too)
This week’s readings attempted to give the non-designers in the class (me) some fundamentals with which to work. I could not have been more grateful. The first few weeks of class, I admit that I was sufficiently overwhelmed with just getting my HTML code to result in an actual website, that my commitment to design was minimal. So the timing for the chapters in WSINYE and Thinking with Type could not have been better.
Before I actually got to the readings, I HAD to go back and fix some of the things on my website. Professor Petrik will be happy (I hope) to see an About page and a Home page – which are different! I changed a few other things, am still trying to get the caption on the pictures in the right places, but please take a look and let me know your thoughts. As always, constructive criticism is welcome! Click here to see the latest version.
With the updates to my website neatly out of the way (for now), and forcing myself to stop messing around with it, I looked at the readings. WSINYE has quickly become my favorite book of the course, if for no other reason than the chapters are short, fun and easy to read. Chapter 5 (Mini Art School) earned a special place this week by teaching me the critical fundamentals. Though I have thought about many of the concepts (line, space, color) before, it was always subconsciously. I never purposefully looked at a page or a website and thought, “that’s a terrible use of scale” or “what a wonderful use of color!” The website just felt right, or it felt wrong. Having the terminology to identify what was going on is great. I even did some of the exercises at the end of Chapter 5. It helped significantly for me to better understand what I was seeing, and how I might apply it to my website.
Writing in a way that I could understand also helped me discover that design really does matter, and that it is actually quite hard. You cannot just tell people what you want to tell them, you have to draw them in, capture their interest and then keep them there.
Chapter 6 and Thinking with Type took these concepts to the next step, helping me to visualize how to build a website using grids. How much easier for my simple mind to grasp squares and rectangles! Much like we outline our papers, and think about what goes where, using grids to layout websites forced me to think about what I want to say. It made the different sections on the webpage feel more important, and made me think that I should take greater care in what I dedicate to precious whitespace.
In short, it seems I will have to return to the design phase before I spend more time trying to “fix” my website. These readings also have helped me to answer a question I have been asking myself since we began this semester: do we first learn the code, or do we learn the design? Certainly, we cannot build a website without knowing some HTML and CSS. However, how good will our websites be if we do not know what we are trying to convey? As I have struggled through the first weeks of the course, I think now it is a give and take between the two. Of course we must know some HTML and CSS to build a website. We must also be able to design, to give us ability to interest our audiences. However, knowing a bit of HTML first has shown me that I must temper my grandiose design ideas with my capabilities – and work with the concepts we are learning in class.
This leads me to the HTML and CSS book and the Lynda.com video – which was a fantastic breakdown of concepts and design of an HTML webpage. With the first code behind me, I can better understand what the narrator was talking about regarding sectioning the webpage, headers and footers. It was still too much information in one sitting, but it is comforting to have it as a reference tool. I am certain that I will be returning to all of the readings from this week, and the video, throughout the semester. Perhaps some of our Art History compatriots could give us some pointers? See you Monday!
See my post on Kirk’s blog; and Beth Garcia’s blog.
